
If you have deployed Windows 10 with USB flash drive, you may know the limitation on UEFI based systems: the USB device must me formatted in FAT32 to be able to boot. This is super painful for two reasons
- FAT32 Flash drives doesn’t boot on legacy BIOS (Granted: depending on how your media is generated)
- FAT32 has a file limitation of 4 GB, exactly what you don’t need when dealing with WIM files…
Many solutions have surfaced (including mine) since the rise of UEFI, most of the time you need to split your WIM file, which works but takes time and must be maintained…
In today’s blog post, we will try to move away from splitting boredom, 4 GB limitation and non-legacy support with a lazy, nice and simple solution.
Pre-requisites
This solution won’t work on something lower than Windows 10 1703 as we will use the ability to partition removable devices that shipped with this release. On the software side you will need:
- MDT 8456 (Any previous version should also work).
On the hardware side:
- A fast USB stick with enough space.
- A PC with support for UEFI.
How to
What we need to build is a two partitions USB Thumb drive. The first one will be a boot partition formatted in FAT32 because FAT32 is readable both by UEFI and legacy BIOS. The second one will host the deployment share and will be formatted in NTFS to overcome the 4 GB limitation.
Start by plugging-in your USB device and open an elevated command prompt. Launch Diskpart and type List disk to identify your USB key.
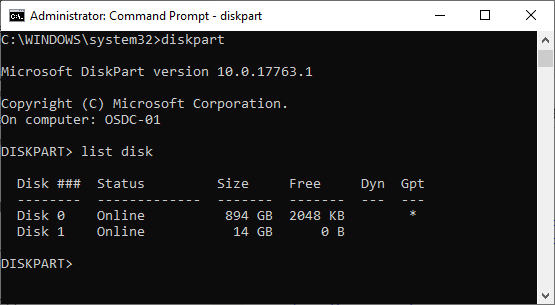
Here, my USB stick is disk 1, don’t forget to change that value to your own finding on all the next coming lines.
Under the diskpart prompt, type the following commands:
Sel disk 1
Clean
Create part pri size=640
Format quick fs=fat32 label=Boot-MDT
Active
Assign
Create part pri
Format quick fs=ntfs label=Data-MDT
Assign
exit
You should end up with a flash drive looking like this:

Using this disk formatting, you may be able to boot on UEFI and legacy BIOS. If you find those settings absolutely not special, you are right !!! There is nothing remarkable here and if you are that kind of engineer that build thumb drives with command line you already know that it works everywhere!
So, what is so special about those parameters? Using them will generate a good old fashioned MBR disk type. Surprisingly enough, you don’t need more to boot on UEFI! If like me you were using tools like Rufus to generate USB drive, you missed this nice tip as the tool always take care of preparing disk in GPT, a disk type format not compatible with legacy BIOS.
Now that we are done with the USB stuffs, let’s build the flash drive content by opening the MDT workbench:
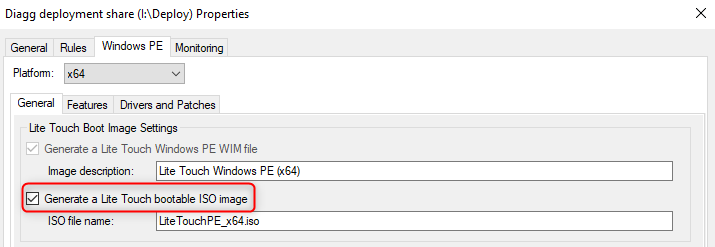
On the MDT console, right-click on your deployment share, select Properties. And pick the Windows PE tab where you’ll have to check the Generate a Lite Touch bootable ISO image check box.
On the Rules tab click on the Edit Bootstrap.ini and check that there is no DeployRoot reference included in the file

To finish the preparation Right-click on your deployment share and click on Update deployment share to generate the boot media ISO.
We’ve just finished preparing the boot partition content. Let’s do the same with windows and applications.
If you have not prepared any media in your deployment share you can simply create a folder named Deploy on the Data-MDT partition and past in your whole deployment share. On the Scripts folder create an empty text file and rename it Media.tag.
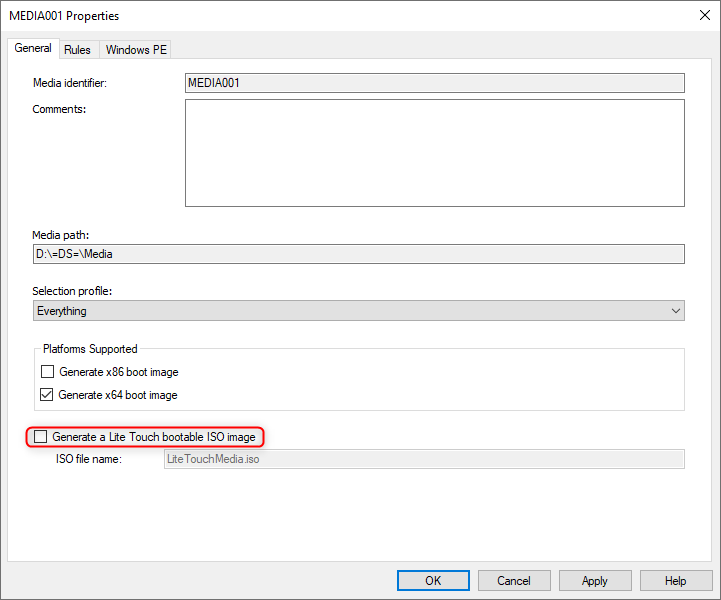
If you already have configured a media, make sur you’ve unchecked the Generate a lite Touch Bootable ISO checkbox
Close the wizard and right click the media entry in the middle pane to select Update Media content. Once the creation is finished, you can copy and paste the Deploy sub folder from the <Path of your media repo>\Content folder to the Data-OSD partition of the USB flash drive.
To be able to boot, the boot media file’s content must also be placed on the USB stick’s Boot-MDT partition.
Within the Windows explorer, jump to <Your MDT share>\Boot\ LiteTouchPE_x64.iso and double click on the ISO file to view his content thru the explorer. Then select and copy the full content to the Boot-MDT partition.
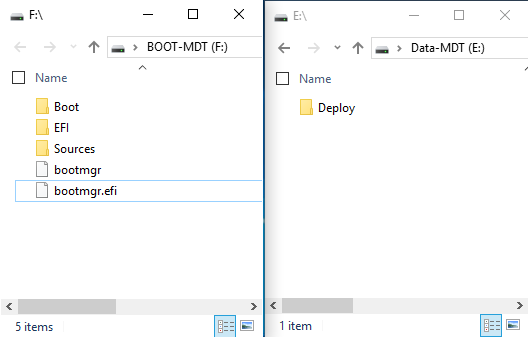
Congratulation, you’ve just built a fully functional mobile deployment solution that works seamlessly whether you are on UEFI or legacy BIOS and that support files larger than 4 GB!!
Both usb partition should look like that:
…But how does it work?
If you wander how MDT still works when placed on two partition, here is the high-level view of what happens behind the scene:
At boot time, Windows PE will load, and launch his own embedded LiteTouch.wsf script. The script will then search on all active drives the following file <Drive letter>: \Deploy\Scripts\Media.tag. The first found occurrence will be the home of the default deployment share (Big up to the MDT team for bringing such nice logic into the product) which should always be the Deploy folder placed on the other USB partition.
Final note
Worth noting, the ability to work over different BIOS types opens the road to nice BIOS to UEFI migration scenarios based on USB sticks, something that was note possible before.
Also (teaser), beeing able to bypass the 4 GB limit will allow to capture WIM files or even cooler… FFU files…
While not being 100% full proof, this solution should work most of the time. I conducted small tests on a Lenovo T450, an HP 820 and a Dell Latitude 7490 with various setup like legacy only, UEFI only (with secure boot) and UEFI with CSM, I was able to boot in every case (Yeah !!!)
I would like to thanks my dear colleague Chris Descamps for great support and help and Luís Ponce de Leão for bringing the dual BIOS boot idea to the table.